Pinterest

Follow Me on Pinterest

Sunday 17 March 2013

Tomato and Sweet Pepper Soup

This is a tomato soup base that I make all the time, this time I paired the tomato with an orange sweet pepper. It is delicious and 100 times better than any canned soup. 


Ingredients 


  • 1 tbl extra virgin olive oil
  • 4 large tomatoes, or 6 smaller ones
  • 2 stalks of celery
  • 1 sweet pepper
  • handful of baby carrots
  • 2 cloves of garlic
  • 1 tsp garlic salt
  • pepper to taste
  • 2-3 cups of chicken broth
  • pinch of creole seasoning
  • 2 cups of cooked pasta (optional)
  • parmesan cheese to garnish


Directions

Heat a large frying pan on medium heat with 1 tbl of olive oil.

 Coarsely chop your veggies. 


Add your veggies to your pan and season with garlic salt and pepper. 


Cover and turn your heat down to med-low. Let cook for 30-40 minutes. If you are going to add pasta cook it now in a separate pot to al dente and then set it aside.

Once your veggies are all cooked down and soft they should look a little like this. 


Add your veggies to a food processor or blender with a cup of  broth. Blend until smooth. 


Pour the contents into a pot and add the rest of your chicken broth to the consistency of soup that you would like. I live mine on the thicker side so I only use a couple cups of broth all together. 

Add your pinch of creole seasoning and salt and pepper to taste. If you cooked pasta to go in it add it now and let simmer for a 5 minutes. Serve with a little parm on top and enjoy!


*** On a side note***I don't use regular chicken stock I have now switched to Better than Bouillon  if you haven't tried it go out to Costco and get some now! It's great, it makes the best soups and gravies and lasts much longer than the cartons of chicken stock. 

Tuesday 5 March 2013

Best Homemade Playdough with Silly Guy Fun!


I found this recipe for the "best ever playdough ever" from Adelyn Stone Blog and had to try it out. I have made homemade playdough before but found it was too dry or too sticky. I had to make an adjustment to the original recipe because I didn't have cream of tartar but it really did live up to it's name. 

Here is the recipe I used to make it:


The Best Ever Playdough Ever!!!

What you need:

1 cup flour
1/4 cup salt
1 cup water
2 tsp oil (I used olive oil)
1 tbl spoon vinegar (in replace of cream of tartar)
glitter
food coloring

Directions:

Mix all together in a saucepan, doesn't matter the order. Once most of the lumps are gone but it on the stove on medium heat and stir until it all clumps onto your spoon. Then put it on a lightly floured surface and knead it. It will be very sticky at first but as you knead it and it cools it will become playdough consistency. 


Even Charlie had to check them out!


While the kids were playing with the playdough (and getting bored of making shapes) I had the brilliant idea of getting our bucket of potato head pieces out so that the kids could make silly guys with their new playdough. That was a huge hit. They spent a couple hours mixing up eyes, arms, hats and noses. We had a contest boys vs. girls to see who could come up the silliest looking guys. 


Our contest creations. 

Thursday 14 February 2013

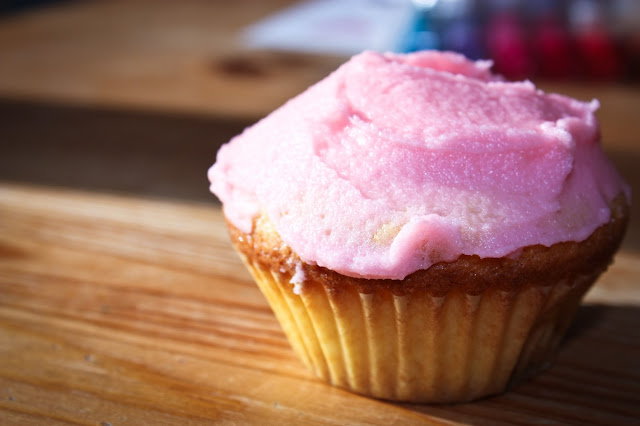
Super Yummy Coconut Cupcakes


I am all about the coconut oil, it is good for you, smells great and tastes great. I wanted to make cupcakes for valentine's day and thought I would look for a cupcake recipe that used coconut oil. I found a recipe Chef Chloe and it inspired my recipe. I substituted the coconut milk for regular milk (so it's not a vegan recipe anymore) and the canola oil for coconut oil. We made these for Valentine's Day and they were super yummy!

Here is the recipe I made them from:

Ingredients (makes 12 regular or 20 mini cupcakes) 


  • 1 3\4 cups all-purpose flour
  • 1 cup sugar
  • 1 tsp baking powder
  • 1 tsp baking soda
  • 1/2 tsp salt
  • 1 1\4 cup warm milk
  • 1\2 cup coconut oil
  • 1 tblsp apple cider vinegar

Directions

Heat oven to 350 degrees. Line muffin tins with paper cups or grease the tin with Pam. Mix together flour, sugar, baking powder, baking soda and salt into bowl. In a separate bowl beat coconut oil until smooth. Add warm milk in a stir (it must be warm otherwise the coconut oil will solidify and be chunky). Add apple cider vinegar to milk mixture. Mix dry ingredients into the wet and stir until smooth. Fill cups 2/3 full and bake for 15 minutes, or until toothpick comes out clean. Take out and let cool, once cooled ice with pink coconut icing. Enjoy!


Ingredients for Pink Coconut Icing

  • 3 cups icing sugar (I didn't have any so I read online that you can put a cup at a time in your blender for 2 minutes on high and it turns it into icing sugar, they were right!)
  • 1\2 cup coconut oil at room temperature
  • 1\2 cup butter at room temperature
  • 1/4 milk
  • red food dye (optional)

Directions

Cream butter and coconut oil together, add 1 cup icing sugar and 1 tbl milk at a time until mixture is fluffy and smooth. Add a few drops of red food dye in while mixing until it is light pink. 
Alida approved!

Valentine's Day Breakfast


We had a fun Valentine's Day, while I was getting ready to make this post I realized all of our activities revolved around food. Who doesn't love food?!

A Heart-filled Breakfast!

I wanted to make a special breakfast for my kids on Valentine's morning. I made bacon, eggs and toast all heart shaped.

I made a heart shaped poached egg by putting a greased heart shaped cookie cutter in a frying pan that was on medium heat with a bit of olive oil in it. Then I cracked the egg and poured it inside the cookie cutter. Next I poured 1/4 cup of water in the pan then put a lid over the pan and cooked for a couple minutes (my kids like a firm white and runny yolk for dipping). I carefully pushed out the egg onto the plate and there you have it, a poached heart egg!


Next I made heart shaped bacon by folding it into the shape of a heart on a baking pan. Then into the oven at 400 degrees for 15 minutes. Next I made some toast and cut it into the shape of a heart.


The finished product!


They were excited, even though my son looks like he is still asleep lol.

Thursday 31 January 2013

Cheerio Names

This was a fun and tasty activity for the kids. It is not only fun and yummy but also helps with dexterity and letter recognition. 


All You Need

  • card-stock or cardboard
  • pen/marker
  • cheerios
  • glue

Directions

I wrote out their names on a piece of card-stock and went over the letters with glue (one at a time so they wouldn't smear it all over the place). The kids then took the cheerios and placed them on the letters. 

They had fun taking "snack breaks" between each letter. We also took time to talk about what letters we were working on, the sounds they make and who had the same letters in their names. 


Ivory Soap Cloud

I have seen the pin on Pinterest with the Ivory Soap Cloud and when my husband came home from Costco with a huge pack of Ivory Soap bars I just had to give it a shot (I am not sure if it works with any other kinds of soap). I thought how much fun it would be to let the kids watch it grow then split up the cloud and let them mold it into shapes and a new bar of soap that they could use - as said promised here - Our Best Bites

So I didn't read all of the instructions...a shock I know. I tried to get the kids to mold the soap by squishing it into cookie cutters, but it would all just fall apart again. You do need to mix it in a food processor with some warm water THEN put it into the cookie cutter to mold it. 
The kids all lined up to watch the soap grow in to a cloud.

Here is our soap cloud after 1:30minutes in the microwave. I have to warn you the smell is overpowering. I also found 1/4 of the bar in the back of the microwave so I put that part back in for another 45 seconds. 

 Here they are trying to mash the dry soap cloud into cookie cutters...not working....


While the activity was fun, it made a HUGE mess everywhere, this stuff gets on the floor, on clothes and tracked through the rest of the house. The kids had fun but I think I spent more time cleaning up afterwards than they did playing with it. 

I was left with a pile of dry soap flakes which I saved in a jar and use it to wash my hands at the kitchen sink. The kids think it's fun to use the soap crumbs so I guess it wasn't a total fail. 

Wednesday 30 January 2013

GOOP!

Indoor Winter Fun


Living in Calgary during the winter time with small children at home allows you to think of some very creative and fun activities to do indoors, or if you're like me that is what Pinterest is for! Here is the most popular activity of all of the fun things that we have been up to.


Goop!!!!


Goop is a fun activity to not only make but also play with. I made this one at home with my children, this not only kept them entertained for a couple hours but my husband and I had a hard time resisting playing with the goop as well. I got the recipe from Sugar Bee Crafts. We ended up making a few colors and it ended up last up to 3 weeks before it started to leek some gross liquid out of it. 


The kids loved using all sorts of baking and play-dough tools on the goop. We also made one with clear glue as well, it was fun but broke apart in crumbs and made more of a mess. I prefer the white glue goop. This was honestly their favorite activity to do for a couple weeks. 

Here are the directions:

Ingredients:

  • 1/4 cup of white glue
  • 1/4 cup of water
  • 1/4 warm water
  • 1/2 tsp of borax
  • food coloring
Mix the white glue and water together in a bowl, add a few drops of food coloring (not too much we made that mistake and had blue hands for a couple days). In a separate bowl add the borax to the warm water and let sit for 15 seconds then mix together. Add borax solution to the glue solution. As you mix it you will see it is going to clump together. The more you play with it the more it turns into a solid clump of goop! 

Have fun!